This guide covers how to set up OpenClaw (formerly Clawdbot) on your local machine and, most importantly, how to secure it so strangers can’t access your computer. If you are ready, then let’s get started! :)
How to Set Up OpenClaw
Install OpenClaw
First, open your terminal (Command Prompt or Terminal on Mac/Linux). You need to install the tool globally. Run this command:
curl -fsSL https://openclaw.ai/install.sh | bash
OR if using npm directly:
npm install -g openclaw
Run the Onboarding Wizard
Once installed, start the configuration process:
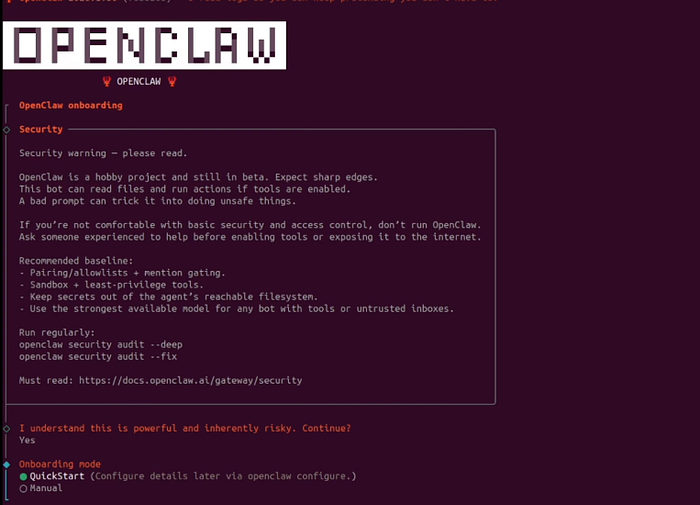
openclaw onboard
- Security Warning: You will see a warning that the bot works on your local machine. Read it and accept.
- Quick Start: Select “Quick Start” for the easiest setup.
Model Selection: Choose your AI provider (e.g., OpenAI Codex or GPT-4). You will need to log in to your provider account.
Connect a chat platform — After the model is selected, OpenClaw asks you to set up a chat interface. Select your preferred platform (e.g., Telegram).
- Open Telegram and search for @BotFather.
- Send the command
/newbot. - Give your bot a name and a username (must end in
_bot). - Copy the Token provided by BotFather.
- Paste this token into your terminal when OpenClaw asks for it.
A similar process applies to WhatsApp, Discord, and other chat platforms.
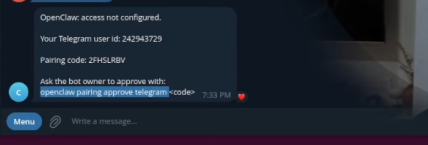
Get Your User ID
You need to tell OpenClaw who is allowed to talk to it.
- Search for @userinfobot in Telegram.
- Click “Start” to see your ID (a number).
- Copy and paste this ID into the OpenClaw terminal.
Pair Your Bot
Restart your gateway to apply changes:
openclaw gateway restart
Configure skills (optional) — OpenClaw can install skills (tools) to perform tasks such as sending emails or editing files. During onboarding, you can skip or install skills. If you choose to install, use npm as the node manager; otherwise, select Skip for now.
Provide API keys (optional) — Some skills require API keys (e.g., Brave Search API). During setup, you can say No if you don’t have keys yet.
Choose UI — OpenClaw offers a web‑based Control UI or a TUI. The TUI keeps everything in the command line and is recommended for first‑time setup. When ready, select Hatch in TUI to start the bot’s personality configuration. The bot will ask for its name and how to address you. After that, OpenClaw is ready to chat via the terminal and your chosen chat platform
If you get stuck, please watch my YouTube tutorial:
Watch on YouTube: How to Set Up OpenClaw
Extending capabilities
OpenClaw can perform additional tasks after the initial setup.
- Web searches — If you ask the bot how to perform web searches, it will guide you through obtaining an API key (for example, from the Brave Web Search API) and sending it to the bot via chat. Once the key is set, OpenClaw can search the web and return results.
- File operations — You can instruct your bot to research a topic and save the results to a Markdown file. The bot will generate the file and include citations.
Remember that each new capability increases the bot’s permissions, so enable them carefully and keep security in mind.
How to Secure OpenClaw
By default, giving an AI access to your computer carries risks. Follow these steps to lock it down.
Restrict Gateway Access
Your bot shouldn’t be visible to the whole internet.
- Open your config file:
~/.openclaw/openclaw.json - Find the
gatewaysection. - Change the address
0.0.0.0to127.0.0.1(loopback) This ensures only you (localhost) can access the gateway.
Enable Authentication
Make sure your gateway requires a token:
- In the same config file, ensure
authenticationis set tomode: "token". - Verify a token is present. Treat this token like a password.
Set Channel Policies
Don’t let your bot talk to strangers.
- DM Policy: Set to
"pairing"(requires approval) **. - Group Policy: Set to
"disabled"so the bot can't be added to public groups where it might leak data.
...
  "channels": {
    "telegram": {
      "dmPolicy": "pairing",
      "groupPolicy": "mention"
    }
  }
...
Secure Your Credentials
Protect the files that store your API keys. Run this command to make sure only your user can read the credentials file:
chmod 700 ~/.openclaw/credentials
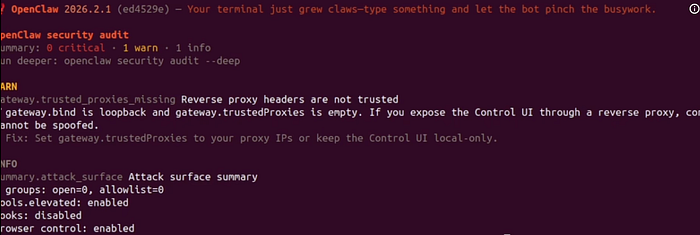
Run a Security Audit
OpenClaw has a built-in tool to check for holes. Run this regularly:
openclaw security audit --deep --fix
If it finds issues, you can often fix them automatically with:
openclaw doctor --fix
Watch Out for “Prompt Injection”
Be careful when asking your bot to browse the web or read untrusted files. Bad actors can hide commands in text that trick the AI. Always use the Sandbox environment when experimenting with untrusted data.
Final Step
After applying these security fixes, always restart your gateway:
openclaw gateway restart
If you want a simple walkthrough, please check my video tutorial:
Watch on YouTube: How to secure OpenClaw Bot
Conclusion
OpenClaw gives you the power of a personal AI assistant that runs on your own hardware. When configured correctly, it can search the web, manage files, and respond to your chat messages across multiple platforms. However, because it uses tools that can execute commands on your system, security must be a first‑class concern.
Stay safe! Cheers! :)