GitHub Copilot CLI brings Copilot directly into your terminal. You can ask questions, understand a project, write and debug code, review changes, and interact with GitHub without leaving the command line. GitHub says Copilot CLI is available on all Copilot plans. It means you can try it with me today! ;)
What GitHub Copilot CLI is
The easiest way to think about Copilot CLI is this: it is an AI coding assistant designed for terminal-based work. It is not just a chat box. It can inspect your local project, help you edit code, debug problems, summarize changes, and support GitHub workflows from the terminal. GitHub describes it as a terminal-native assistant with agentic capabilities and GitHub workflow integration.
This matters because much real development already happens in the terminal. You run builds, start servers, use git, run tests, inspect logs, and work with Docker there. Copilot CLI embeds AI into that workflow, so you don't have to switch tools. That is the main reason it is useful.
If you want to know a bit more details about it, please watch my video:
Watch on YouTube: GitHub Copilot CLI
How to Install GitHub Copilot CLI
You can install Copilot CLI with npm on all platforms, with Homebrew on macOS and Linux, with WinGet on Windows, or with an install script on macOS and Linux. If you install it with npm, you need Node.js 22 or later.

Install with npm
npm install -g @github/copilot
Install with Homebrew
brew install copilot-cli
Install with WinGet
winget install GitHub.Copilot
This is the official Windows install option in the GitHub docs.
How to Launch Copilot CLI
After installation, start the interactive interface in your project folder (not root folder) in the terminal window with this command:
copilot
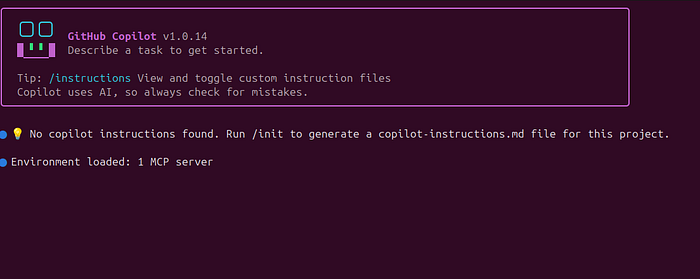
When you first launch the CLI, you can use /login and follow the prompts to authenticate with your GitHub account. You usually only need to do this once.
When you start the Copilot CLI in a project folder, GitHub prompts you to confirm that you trust the files in that folder. This is important because during the session, Copilot may try to read, modify, and execute files in that folder and below it. So, only continue if you trust that location.
How Copilot CLI works
You can type prompts in normal English, like:
- Explain this project
- Find where authentication is handled
- Add validation to this form
- Help me debug this error
That is the easy part. The more important part is learning the control commands inside the interactive session. These slash commands help you manage the session, switch models, review changes, share results, and use more advanced workflows.
The core slash commands you should know
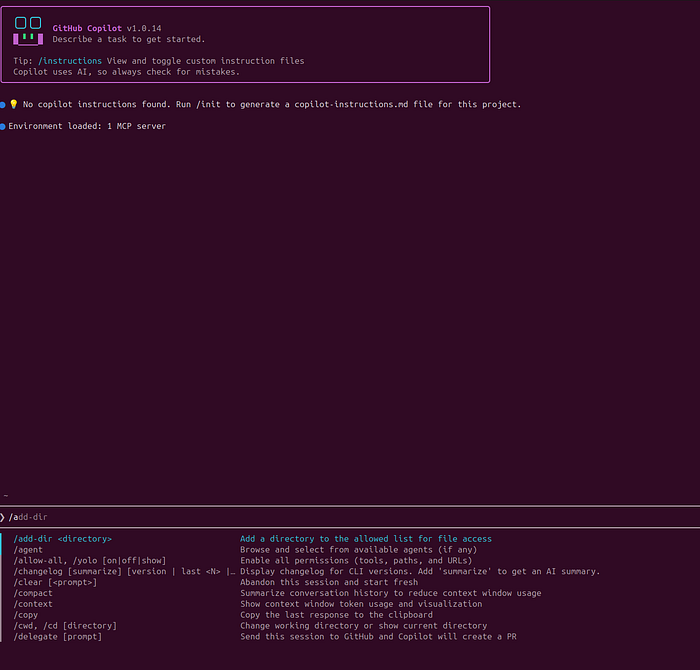
/help
Use /help to view available commands. This should be your first stop whenever you forget a command or want to see what has changed. GitHub’s docs recommend checking the in-product help because the CLI evolves over time.
/models
Use /models to choose a model. This matters because different models may feel different in speed, reasoning depth, and output style. GitHub also has auto model selection concepts that can reduce the need to choose manually in some cases.
/plan
GitHub’s best practices guide says models do better when given a concrete plan. In Copilot CLI, you can press Shift + Tab to toggle between normal mode and plan mode, or you can use the /plan command from normal mode. In plan mode, Copilot creates a structured implementation plan before any code is written.
This is a very good habit for beginners. Instead of telling Copilot to build something immediately, first ask it to create a plan. That usually makes the next steps cleaner and easier to review. GitHub explicitly recommends planning before coding.
/context
Use /context to inspect how much context is being used. This is especially helpful in longer sessions when you want to avoid running out of room.
/compact
Use /compact to summarize the current conversation and free up space without fully starting over. This is useful when the session gets long but you still want to preserve the important context.
/clear
Use /clear to fully reset the current session. This is the fastest way to start fresh if the conversation has gone off track.
/resume
Use /resume to reopen an earlier session and continue from where you left off. This is one of the best workflow features because you do not always need to restart from zero.
/diff
Use /diff to get a summary of changes made during the session. This is a strong habit before committing, reviewing, or explaining the work to someone else.
/review
Use /review to run the code review agent on the changes. This is one of the most important commands in real use because it helps you check maintainability, bugs, edge cases, and general code quality after generation.
/share
Use /share to export the session to a Markdown file or GitHub gist. This is useful for documentation, debugging, mentoring, and team collaboration.
/session
Use /session to inspect information about the session, such as checkpoints, files, the current plan, or even rename the session. This becomes useful when the workflow gets more complex.
/delegate
Use /delegate when you want to hand the task off to Copilot coding agent on GitHub instead of keeping all work local.
/fleet
The /fleet lets Copilot CLI break down a complex request into smaller tasks and run them in parallel. This is especially useful for bigger maintenance tasks or multi-part work where a single linear flow is slower.
/agent
GitHub also supports custom agents. When using Copilot CLI, you can choose a custom agent with the /agent command, or reference the agent in a prompt or command-line argument.
In simple English, a custom agent is like a specialist teammate. You might create a frontend agent, a documentation agent, a testing agent, or a refactoring agent. This becomes very useful when you want Copilot to behave in a more repeatable and opinionated way for a certain kind of task.
/skills
Skills are reusable capability packages that can add instructions and specialized behavior. You can manage skills with /skills, and the supported subcommands include list, info, add, remove, and reload.
You might create skills for frontend design, documentation generation, PDF handling, release note formatting, or internal coding rules. Skills are especially useful when you do the same kind of work often and do not want to repeat the same long instructions every time.
A simple beginner workflow
If you are new to Copilot CLI, do not start with a giant prompt. Start with a small, safe workflow.
First, move into a project:
cd your-project
copilot
Navigate to a folder with code you want to work with and then enter copilot to start the session.
Then start with project understanding:
Give me a simple overview of this project. Explain the folder structure, main entry points, and what I should read first.
This fits GitHub’s positioning of Copilot CLI as a tool to answer questions and help you understand and work with code from the terminal.
Next, narrow the scope:
Find where authentication is handled and explain it in simple English.
Then plan before editing:
/plan Add basic validation to the login form and keep the current style.
After reviewing the plan, let Copilot implement the small change.
Then inspect the result:
/diff
/review focus on bugs, maintainability, and edge cases
Autopilot mode
Autopilot or YOLO mode lets Copilot CLI work autonomously on a task, carrying out multiple steps until the task is complete. In normal use, you usually go back and forth step by step. In autopilot mode, Copilot keeps working after the initial instruction instead of waiting for you after each step.
This is powerful, but it should be used carefully. A practical beginner rule is simple: use normal mode for learning, use plan mode for clearer structure, and move to autopilot only when you understand the task and the repo well.
You can start Copilot in automod by using this command:
copilot --yolo
Or if you launch Copilot, use:
/yolo on
Common mistakes beginners make

The most common mistake is asking for too much at once. Copilot CLI usually works better when the task is small and clear. GitHub’s best-practices guide strongly supports planning first, which is another way of saying: do not jump straight into a giant, vague request.
Another common mistake is accepting generated code without review. That is why /diff and /review should become normal habits. GitHub gives you those commands for a reason.
A third mistake is letting the session become messy. Long sessions are useful, but only if you manage them well with /context, /compact, /clear, and /resume.
A fourth mistake is being too relaxed about permissions. GitHub’s trust warnings are there because Copilot may read, modify, and execute files in the working directory. So take those prompts seriously.
Useful Resources to Learn More about GitHub Copilot
- Copilot CLI overview and guides: https://docs.github.com/en/copilot/how-tos/copilot-cli
- Getting started: https://docs.github.com/en/copilot/how-tos/copilot-cli/cli-getting-started
- Full list of CLI commands: https://docs.github.com/en/copilot/reference/cli-command-reference
- GitHub Copilot CLI Free Course (Microsoft): https://developer.microsoft.com/blog/get-started-with-github-copilot-cli-a-free-hands-on-course
- Scott Hanselman (Microsoft): practical demos, real developer workflows
- Dan Wahlin (Microsoft): Great explanations + clean teaching style
- Burke Holland: Great content about VS Code and GitHub Copilot
Conclusion
GitHub Copilot CLI is a terminal-native AI assistant that can help you understand projects, plan work, make changes, review code, manage sessions, connect with VS Code, and grow into more advanced workflows with skills, custom agents, and autonomous execution. If you have a Copilot subscription, then definitely give it a shot.
Cheers, proflead! ;)