


Connect your ChatGPT Dot to your computer so it can start Codex tasks with your local files and projects. Here are the setup steps. If a step is unclear, watch my video walkthrough to follow the clicks on screen.
You need a Dot already set up and the ChatGPT desktop app on the computer you want to connect. Dots are still rolling out; check the current access requirements if you cannot find yours.
1. Open your Dot's profile
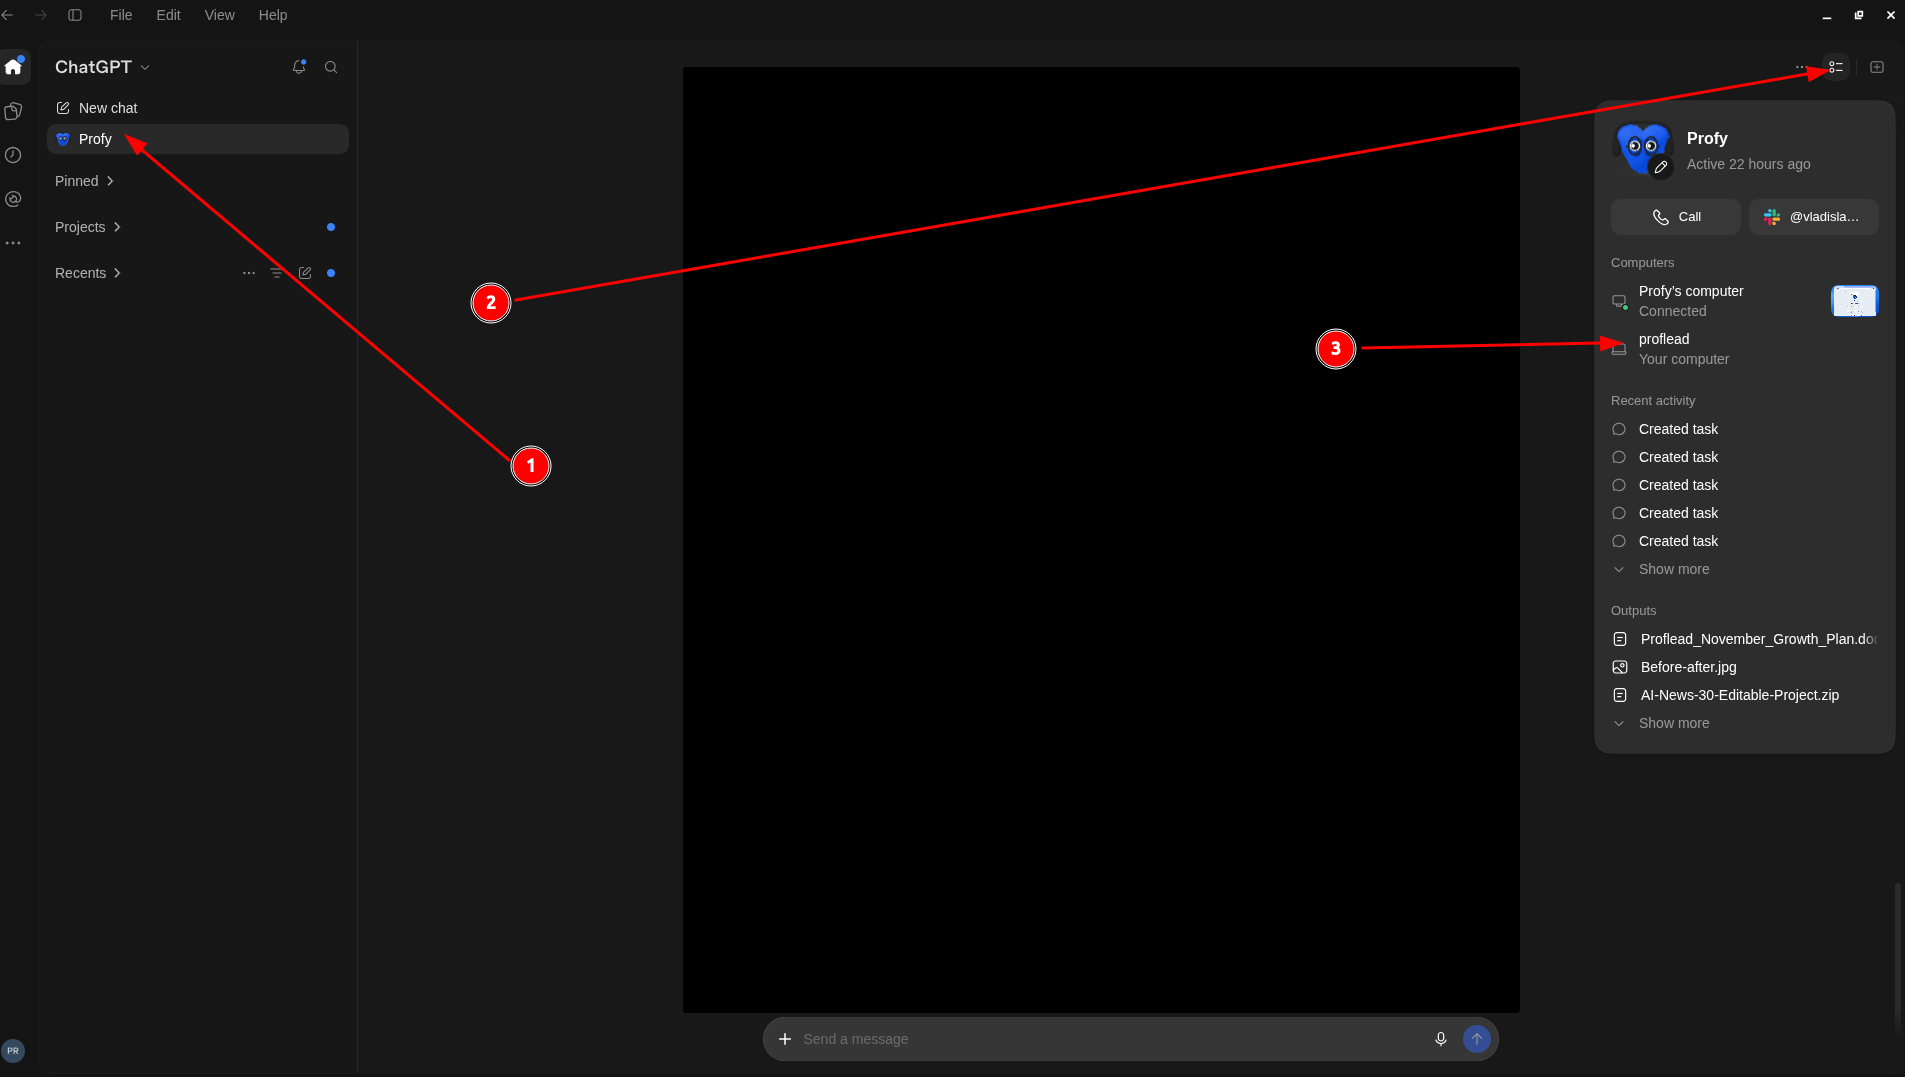
Open the ChatGPT desktop app and select your Dot in the sidebar. Then open its profile or details panel. My Dot is called Profy.
2. Allow access to your computer
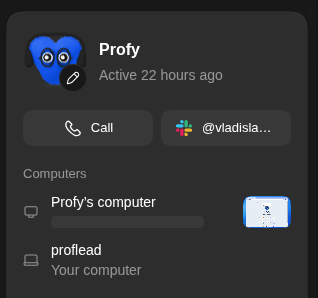
Under Computers, find Your computer and select Allow access. In my recording, the button says Allow and my computer is named proflead.
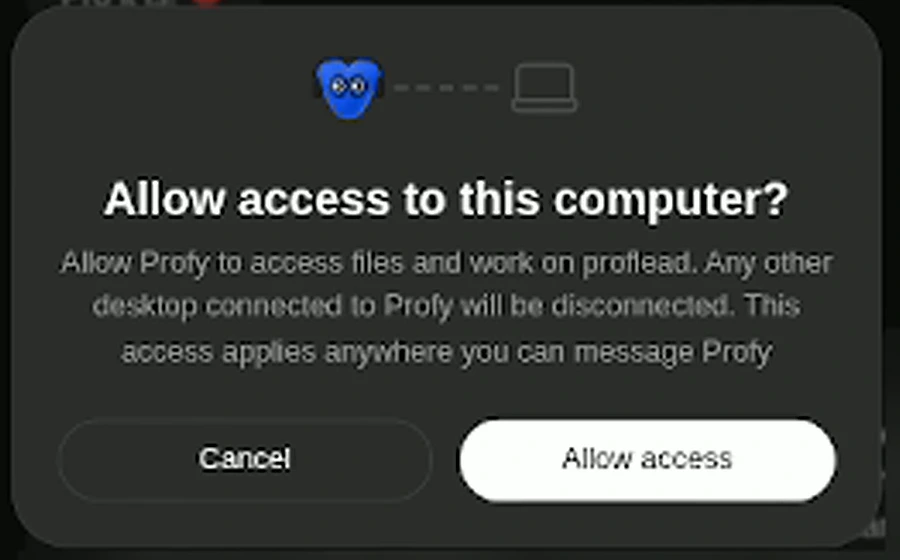
Read the confirmation, select Allow access, and wait for the connection to finish.
You can connect one personal computer at a time. Keep it awake, online, and running the ChatGPT app while your Dot uses it. See OpenAI's computer connection guide.
3. Check the connection
Open ChatGPT in your browser and select the same Dot. Ask:
Can you use Codex on my connected local computer?
Tell me the computer's name.
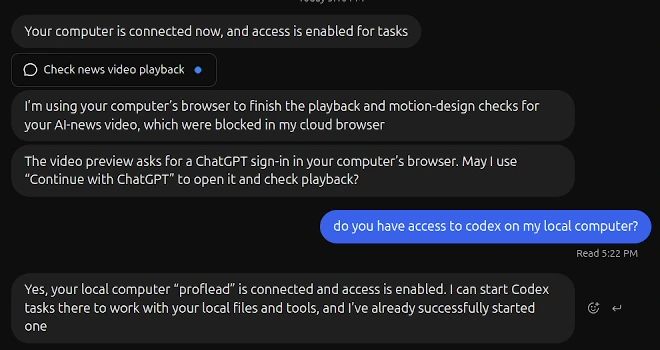
Check that it names your own machine. The cloud computer can also show Connected, so check the local task too.
4. Try a local Codex task
Here is an example to try with your project:
Use Codex on my connected computer.
Open [full path to your project].
Run the project's existing tests without changing files.
Report the computer and folder you used,
which tests passed or failed, and any errors.
If there are no tests, tell me.
Replace the folder placeholder with your project's full path. In the desktop app, open your Dot's profile, select Activity, and open the task to check its progress and results. See OpenAI's local task guide.
Watch the full walkthrough
If you still need help with the setup, watch the video. I show where to allow access in the desktop app and how to check the connection from the browser.
Watch on YouTube: How to Connect ChatGPT Dots to Your Computer and Run Codex