Do you want to automate tasks without writing a single line of code? If the answer is yes, then you’ve come to the right place. In this simple tutorial, I’m going to show you how you can create your first automated workflow using a tool called n8n.
What Exactly is n8n?
At its core, n8n is a powerful, open-source workflow automation tool. It helps you connect different apps, automate repetitive tasks, and streamline your operations without writing extensive code. If you’ve ever heard of services like Zapier or Make.com, n8n does a similar thing, but with a crucial difference: it offers the flexibility of being self-hosted and is highly customizable.
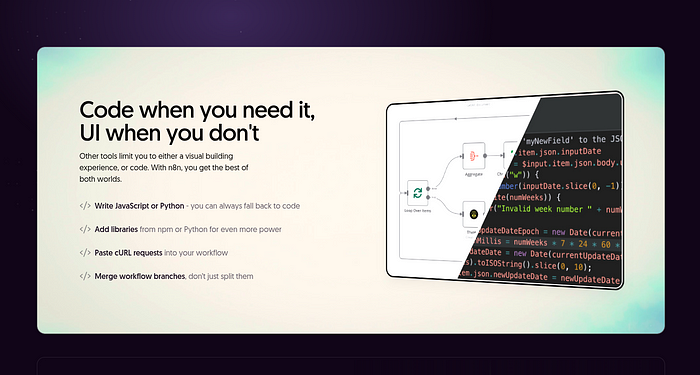
This tool is incredibly useful for almost everyone — writers, developers, marketing specialists, and many other professionals. Its visual, node-based workflow builder makes it intuitive to use. You can think of it like building with digital LEGOs; you drag and drop different nodes, each representing an app or an action, and connect them to create a workflow.
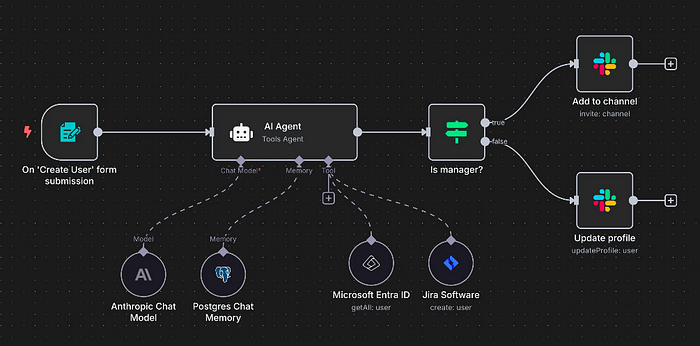
One of the most important things about n8n is that it’s open-source. This means it has a strong community behind it and is constantly evolving. You also have the option to self-host it on your own server, giving you complete control over your data and infrastructure, which is a massive advantage for privacy and customization. This tool enables you to automate tasks that would otherwise require building a custom application from scratch. For example, you could automatically collect data from a form, process it, and then send a summary to your team’s Slack channel every day. The possibilities are truly endless.
Getting Started with n8n
First, we need to set up an account.
Navigate to the n8n website. Open your browser and go to n8n.io.
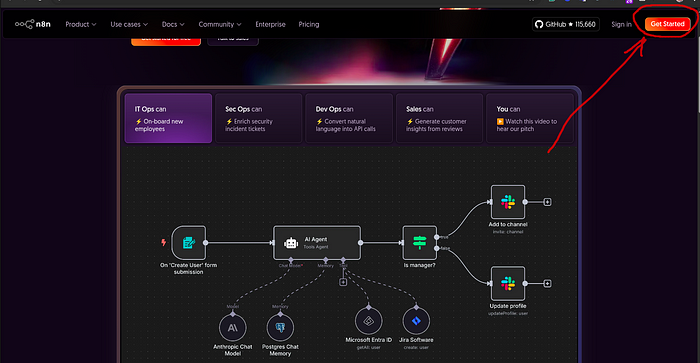
Sign Up. Click the “Get Started” button. You’ll be taken to a registration page to create your account.
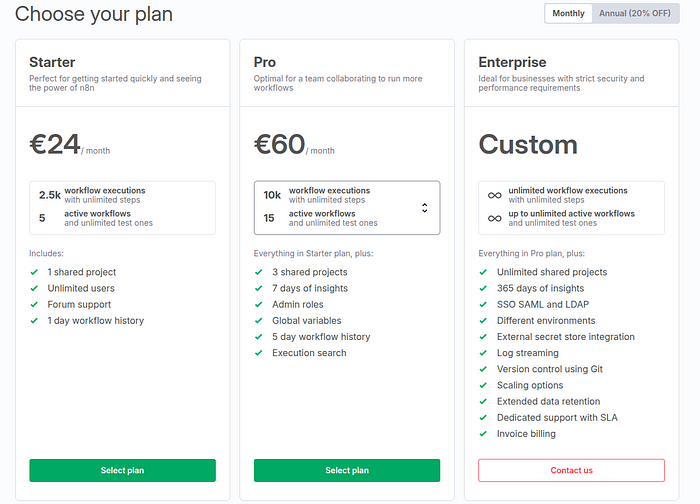
Choose Your Plan. n8n offers a cloud-hosted version, n8n.cloud, which is a paid service with different subscription plans. However, for our tutorial, we’ll use the free trial, which is perfect for getting started and learning the ropes. It has some limitations, like the number of workflow executions per month, but it’s more than enough for testing.
Log In. Once you’ve signed up, you can log into your dashboard at app.n8n.cloud. You’ll see an orange button that says “Open Instance.” Click that to enter your workflow canvas.
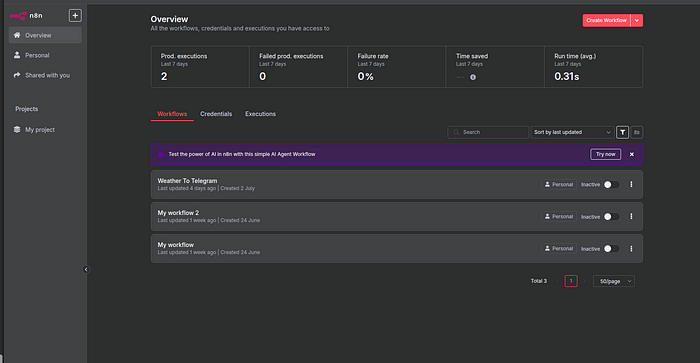
For those who are more technical, there’s also a free-to-use Community Edition that you can host on your own server, giving you full functionality without a subscription. I’ll cover how to do that with Docker in a future video, but for today, the cloud version is the quickest and easiest way to start.
Building Your First Workflow: A Daily Weather Notifier
Let’s create something practical. I’m going to build a weather notifier that sends a message to my Telegram messenger every morning with the weather forecast for Bangkok.
Step 1: Create a New Workflow and Set the Trigger
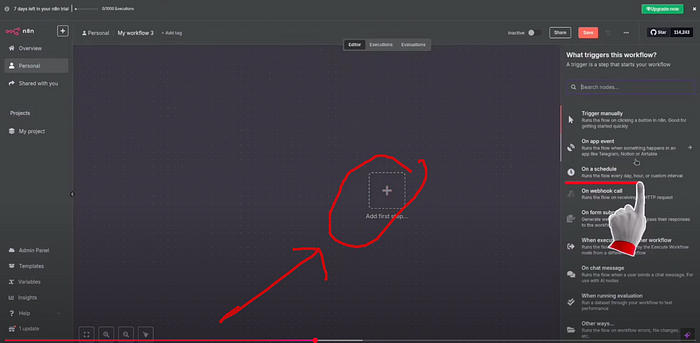
On your dashboard, you’ll see a button to “Start from scratch.” Click it to open a blank canvas. Every workflow starts with a trigger — an event that kicks things off.
- Click on the “Add first step…” button. A menu will appear on the right.
- Select “On a schedule.” This allows us to run the workflow at a specific time.
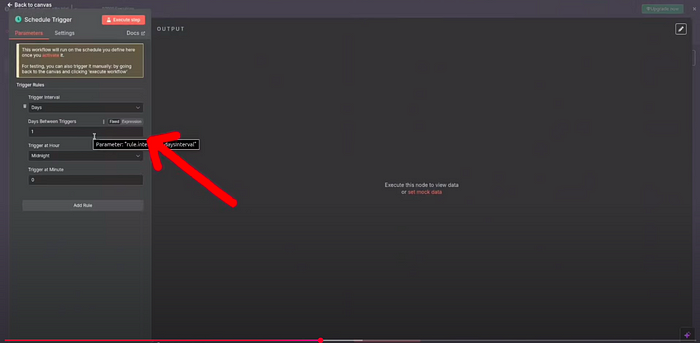
- In the configuration panel on the left, set the “Trigger Interval” to “Days.”
- Set the “Trigger at Hour” to 7am. This means our workflow will run every day at 7 in the morning.
- Click “Back to canvas” at the top left.
Step 2: Get the Weather Data with an HTTP Request
Now that we have our trigger, we need to fetch the weather data. We’ll do this by making a request to a free weather API.
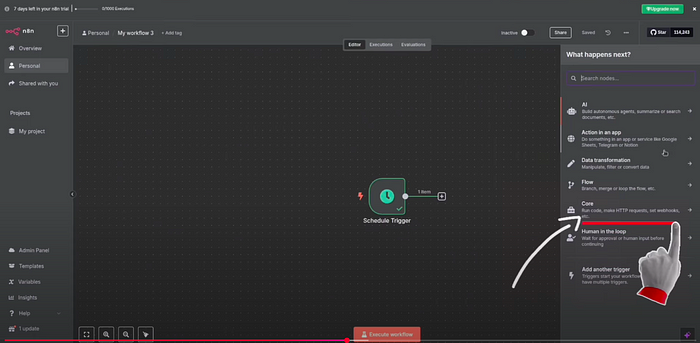
- Click the plus (+) icon on the right of your Schedule Trigger node.
- In the “What happens next?” menu, search for “Core” and then for “HTTP Request” and select it. This node can communicate with almost any API on the web.
Get the Weather Data with an HTTP Request
- Next, we need an API URL. I’m using the free service at open-meteo.com. On their website, I can configure the forecast I want. I’ll set the location to Bangkok and select “Temperature” and “Rain” as the hourly weather variables. The site generates an API URL for me. Copy the generated API URL.
- Go back to your n8n workflow. In the HTTP Request node’s settings, make sure the “Method” is set to GET and paste the API URL into the “URL” field.
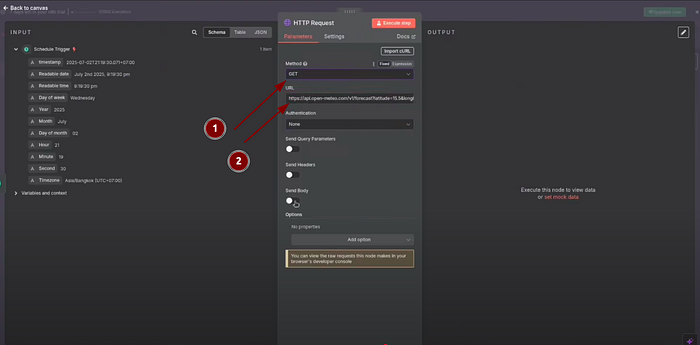
- To check if it works, click the “Execute step” button. On the right, you’ll see the output in JSON format. This is the data we received from the weather API, which we can now use in the next step.
Step 3: Send the Notification to Telegram
This is our final step. We’ll take the weather data and send it as a message.
- Click the plus (+) icon after the HTTP Request node.
- Search for “Telegram” and select it.
- Connect Your Account: First, you’ll need to provide credentials.
- Click on the “Credential to connect with” dropdown and select “Create new credential.”
- You’ll need a Telegram Access Token. To get this, you have to talk to the BotFather in Telegram to create a new bot. It’s a straightforward process, and BotFather will give you the token.
- Paste your Access Token into the field and click “Save.”
Configure the Message:
- You need to provide your “Chat ID.” This is the unique identifier for your private chat or a group chat where you want the message to be sent.
- Now for the fun part: writing the message. In the “Text” field, we can combine plain text with dynamic data from our previous step. On the left, you can see all the data from the HTTP Request.
- Then, from the input data panel on the left, find the temperature value (e.g., hourly.temperature_2m) and drag it into the text box. n8n will automatically create an expression like {{ $json.hourly.temperature_2m[7] }}. This expression takes the temperature for the 7 AM slot.
- My final message looks like this: The weather today is {{ $json.hourly.temperature_2m[7] }}°C. The preview below the text box shows you what the final message will look like.
- Click “Execute step” to send a test message to your Telegram. You should receive it instantly!

Step 4: Activate Your Workflow
Once you’re happy with everything, it’s time to set it live.
- Give your workflow a name at the top left, like “Weather To Telegram.”
- Click the “Save” button.
- Finally, toggle the switch at the top of the screen from “Inactive” to “Active.”
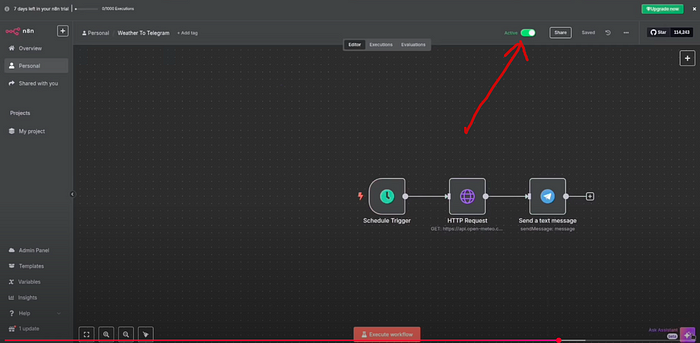
And that’s it! From now on, every day at 7 AM, you’ll get a weather notification sent directly to your Telegram. As you can see, without writing a single line of code, we’ve created a useful application that integrates two different services.
Automation with Templates
If building from scratch seems daunting, n8n has another cool feature: a massive library of over 2,700 workflow templates. You can find these at n8n.io/workflows. You can browse by category — like AI, Sales, or Marketing — and find a workflow that’s close to what you need.
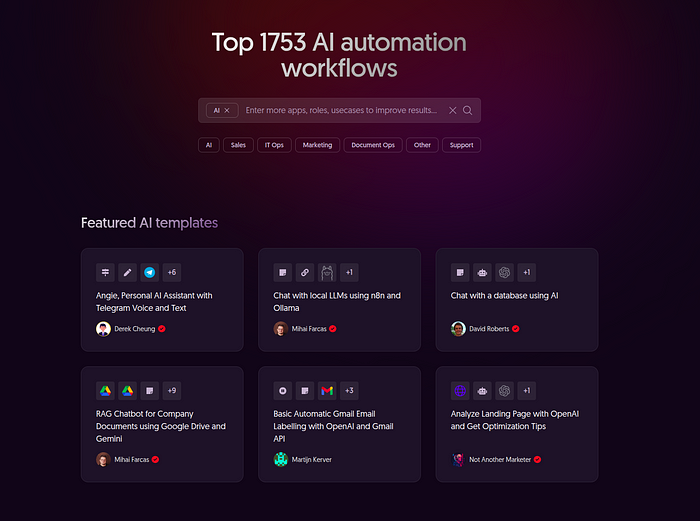
To use one, simply find a template, click “Use for free,” and copy the template JSON to your clipboard. Then, in your n8n dashboard, create a new workflow and paste (using Ctrl+V or Cmd+V). The entire workflow will appear on your canvas, ready for you to customize and add your credentials. It’s an amazing way to learn and build complex automation quickly.
Watch a Video Tutorial About n8n
If you need more visuals, I recommend you to watch my step-by-step video about n8n.
Watch on YouTube: n8n beginner tutorial
Conclusion
That’s all for today! I hope you liked this guide. If you did, please give it a like. n8n is a powerful tool, and this tutorial only scratches the surface. The true power lies in its flexibility and the ability to combine various nodes to solve almost any automation challenge you can imagine. Keep exploring, keep building, and enjoy the time you save by automating!
Cheers! :)

